Google Translate

Minggu, 19 April 2009

Cara Membuat Counter Pada Blog

Congratulations - Here is your Code!

You can configure many options relating to your counter again using the Configure Counter page. If you need to change something that is not available on that page, you can come back to the Install Code page to generate new code for your pages.

What follows is your StatCounter code - simply copy & paste it exactly as it is into your pages to start tracking your visitor data! Make sure you insert it after the tag and before the tag.
Read More......

Your StatCounter code:

Blogger / Blogspot - StatCounter Code Installation Instructions

  1. Copy the StatCounter code.
  2. Log into your Blogger / Blogspot blog.
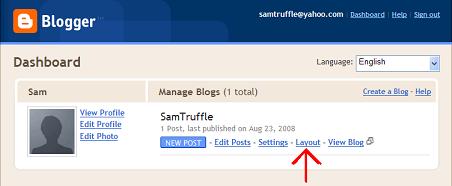
  3. Go to the layout area.

    Blogger - Layout

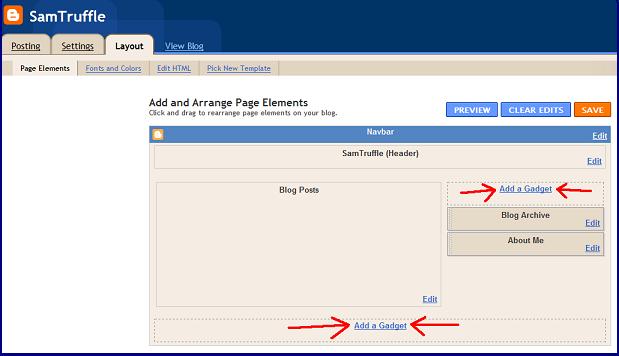
  4. Click one of the “Add a Gadget” links at the bottom or to the right of your blog layout area (as indicated in the picture). (Note from the screenshot that we are in the “Page Elements” tab of the “Layout” area.)

    Blogger - Add a Gadget

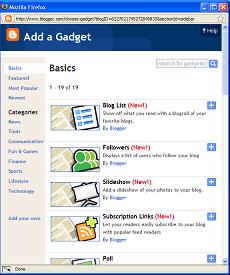
  5. Clicking “Add a Gadget” opens a new window similar to the one pictured below.

    Blogger - Add a Gadget Window

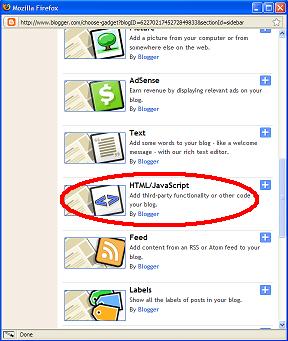
  6. Scroll down through the list of Basic gadgets to find the HTML/Javascript gadget as shown in the picture below. Click the text (that says HTML/JavaScript) to add the gadget to your blog.

    Blogger - HTML/Javascript Gadget

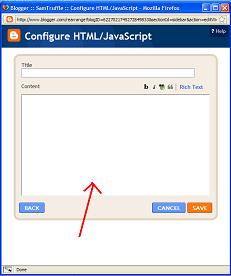
  7. Paste the StatCounter code into the content section of the gadget.

    Blogger - HTML/Javascript Gadget

  8. Click "Save" and that's it!
Your StatCounter will now begin recording visitor information and, if you chose the visible option, your StatCounter will be visible on your blog!

Need More Help? Email Us

If you have any problems at all, with putting this code onto your website, please email us at support@statcounter.com with your question. We will get back to you as soon as possible to help you, usually within the day.

Tidak ada komentar:

Posting Komentar